

A few years ago I got a random email from my mum that contained two bread recipes and a spiel about something called "Artisan Bread in 5 Minutes a Day". I was skeptical that it would work, but I thought I had nothing to lose by trying it. And it was awesome. I have since purchased and loved the book, and I think it's no exaggeration to say that this bread technique changed my life. Okay, maybe it's an exaggeration, but honestly buy the book! And no, I am not being paid by them, although I should be for the amount of preaching I do on their behalf. I am an "Artisan Bread in 5 Minutes a Day" evangelist if there ever was one.
Although I love, love, love, their recipes, I couldn't get the 100% Whole Wheat recipe to work for me when I followed their directions. I have made a few adjustments to the measurements and a few more to the instructions, but I have used their recipe as a starting point. I consider this to be the best easy 100% Whole Wheat Bread ever. I am confident that there are better tasting recipes out there in the wide world of bread making, but I have a hard time imagining anything easier that still tastes this amazing. There are many things that are great about this bread, for example, it keeps well, is moist and chewy, makes your house smell amazing, but my favourite thing is that you don't need any special equipment. I use an inexpensive Sterilite bowl that was a wedding present, and a wooden spoon to mix the dough. If you also have a TBSP measuring spoon, a glass 1 cup measure cup for liquids, and a 1 cup for flour, you are in business.
Gather your ingredients. You will need whole wheat flour, water, yeast, honey, kosher (or some other kind of coarse) salt, and vegetable oil.
Start by pouring your oil into your glass measuring cup. Fill it up to 1/4 cup. Add the honey on top, bringing your total liquids up to 3/4 cup. Pour it all into your large mixing bowl. This is a fantastic trick that saves you from scraping your honey out of your cup. When you start with oil, the honey just slides right out.

Next add 3 cups of lukewarm water. If you had any honey remaining in your cup, it will dissolve in the water and not a drop of that sweet nectar will be wasted.
Add your yeast and salt to the bowl. I like to use the Red Star yeast from Costco because it is cheap ($4 for 2 lbs) and it works great. The recipe calls for 1 1/2 TBSP. I just eyeball the 1/2 because I'm lazy like that. I do the same thing with the salt. Add 1 TBSP and 1 TSP. Or if you are like me, add one full TBSP and around 1/3 of a TBSP and have faith that it will all work out.
At this point, I like to stir it a few times to make sure that I don't have a clump of salt or yeast lurking anywhere. My three year old likes to do this part.
Next add your flour. A quick word on flour. I love King Aurthur brand, but it's too expensive for our grad student budget. I have had good success with Gold Medal, and I can often find it on sale, so I most often use that. Sometimes I feel lazy that I don't grind my own wheat to make flour, but then I remind myself that I'm not Henny Penny, and that I do make my own bread, so I'm not actually lazy. I buy the small 5 lbs bags, because even though I go through a lot of whole wheat flour, it doesn't have a long shelf life. Fresh is best when it comes to whole wheat flour, and old flour doesn't perform as well.
I typically start by adding 4 cups, stir it until it's all combined and then finish stirring in the other 2 1/2 cups. When you first add all the flour it may seem like you'll never get it all mixed together with only a spoon, but trust me, you can do it. Resist the urges to knead or get out your fancy mixer. A wooden spoon will do the job just fine.
This is what your dough should look like when you have it all mixed together. It will be quite sticky, but that is great. Sticky dough makes moist bread.

Now let it sit on your counter with the lid on. You don't want to create an airtight seal, so if you don't have a lid like mine that is useless for everything besides making bread, cover it with a tea towel or loosely with plastic wrap. I find that the ideal raising time is about 2 or 3 hours. Don't leave it too much longer than that, or it won't raise as much in the oven. But all is not lost, it will still be delicious. I often start my bread either after breakfast, let it raise while we are running errands, or going on play dates, and then bake it while I'm feeding my kids lunch. Or if I start it at lunch, I'll put it in the oven about 3pm, and we will have warm bread with our dinner.
After letting the dough sit for around 2 to 3 hours, set your oven to 350 F. While your oven is preheating, spray your bread pans with cooking spray and cut your dough in half. Quickly form your dough into a loaf shape and drop in into the pan. I say quickly, because it will be very sticky. It helps to have slightly damp hands (perfect if you have just washed them and couldn't find a towel).
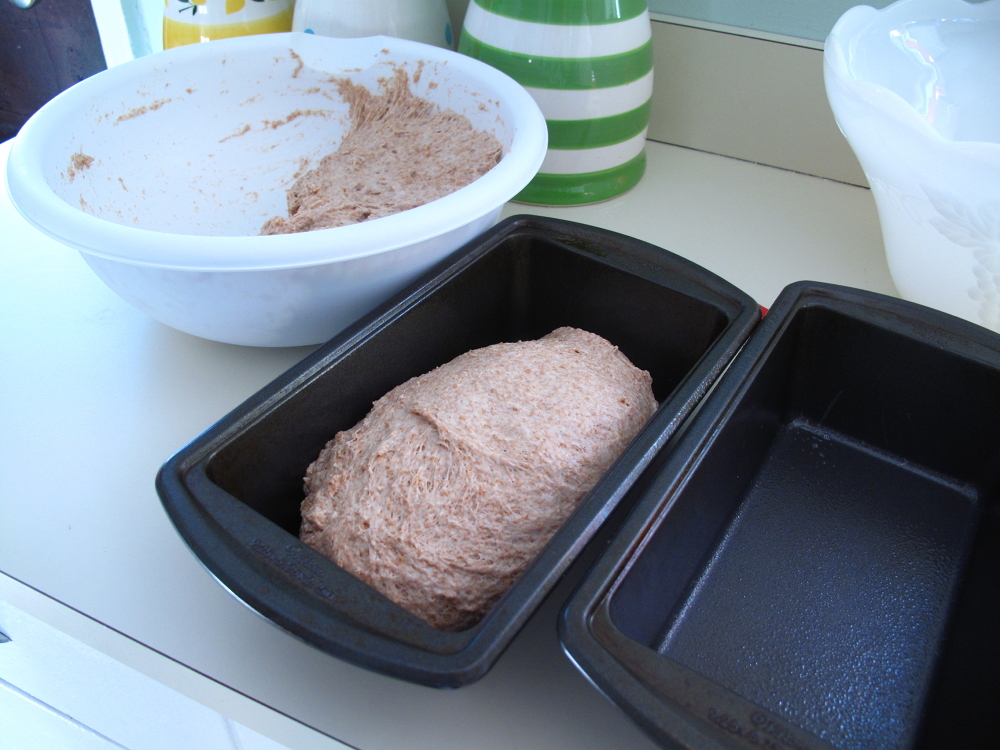
Once you've formed both loaves, put a little bit of cooking oil (the size of a quarter) in the palm of your hand and rub it over the top of your dough. For whatever reason, this helps the loaves form a nice smooth, round top while it's baking. When your oven is hot, put in both loaves, side by side, and set your timer for 52 minutes. Knowing how long to bake your bread is the hardest part. Depending on how hot your oven is, or what your flour is like, or your climate it could take a little more or less time. I have found that I never bake for less than 52 minutes, and never more than 55.
Enjoy the delicious smell of bread baking and take it out when your timer goes off. Remove within a minute or so from your pans, and place on a wire rack to cool. If your bread is sticking to the pans, resist the urge to shake them violently. Instead, try running a knife around the edges to loosen things up. I have non-stick pans, but I keep a plastic knife (the disposable picnic kind) and use that as needed.

I have heard that you should wait to slice into bread until it cools because it has a better taste, texture and it will keep the loaf from drying out. That being said, there is nothing quite so heavenly as a warm, thick, slice of homemade bread with lots of melted butter on top. Here is my recipe. Enjoy!
Best Easy 100% Whole Wheat Bread
1/4 cup cooking oil (not olive, use a mild vegetable oil like canola)
1/2 cup honey
3 cups lukewarm water
1 1/2 TBSP yeast
1 TBSP plus 1 tsp kosher salt (if you only have regular table salt use just 1 TBSP)
6 1/2 cups whole wheat flour
1. Mix everything except the flour in a large mixing bowl.
2. Add the flour several cups at a time, mixing with a sturdy wooden spoon.
3. When all the floor is mixed in, cover loosely and wait 2-3 hours.
4. Preheat oven to 350 F and spray bread pans with cooking spray.
5. Divide the dough in half, and shape into loaves. Place the formed loaves into your prepared pans.
6. Rub a small amount of cooking oil over the top of each loaf.
7. Bake for 52-55 minutes.
8. Remove from pans and cool on a wire rack until you can't wait any longer.

5 comments:
Today I made this recipie, and thought to myself, 'I hate having to scrape all the dough off of the wooden spoon, and using my fingers is even worse... what can I do about this?' So I used a rubber scraper to mix; it worked like a charm.
I have made this two times now and really like it. It's excellent bread, and it's very simple to make. Thank you! Do you have any similar, simple bread recipes? Congrats on your new baby :)
Ok, Carlee, I'm doing it! This Thursday it is on.
Thanks for the recipe!
I was making your bread and reading through the recipe and got to the part of "fresh" whole wheat flour. My grandma taught me an awesome trick. When I buy/grind my wheat I put the excess in the freezer. It keeps it tasting fresh until you need it.
I finally got around to making this bread and loved it. Thanks for the great recipe!
-Jennie
Post a Comment